
Create a Simple Notification Application
January 2024
Table of Contents
- Create a Simple Notification
- Navigation
- Section 1 - Requestor Information
- Section 2 - Manufacturer Information
- Section 3 - Product Information
- Section 4 - List Country or Country(ies) to which the Product is to be Exported
- Section 5 - Attachments
- Final Review Screen
Create a Simple Notification
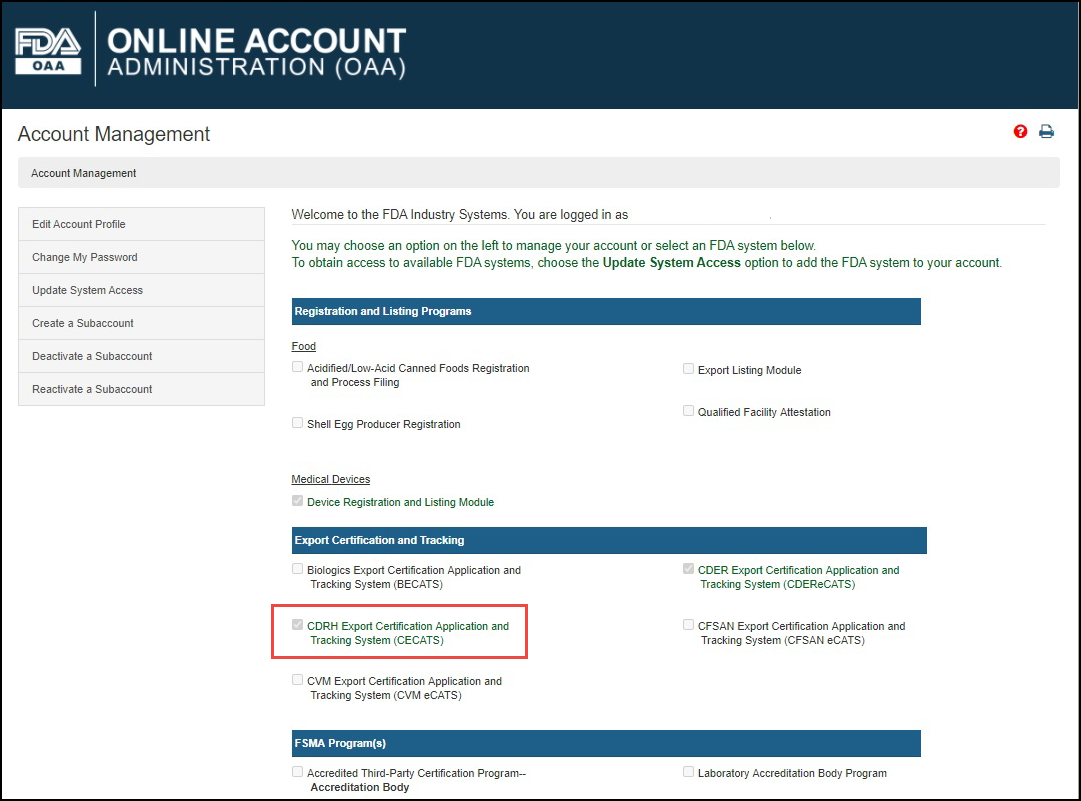
Log into the FDA Industry Systems (FIS) https://www.access.fda.gov and select "CDRH Export Certification Application & Tracking System" from the list of systems available on the FURLS "Home" page, as shown in Figure 1.
Figure
1: FDA Industry Systems Page
Select "Yes" in response to the question "Will the devices be exported from the United States?". Select "Continue" and the system will open the CECATS "Home" page. The CECATS "Main Menu" page is shown in Figure 2 below:
Figure 2: FDA Industry System Page

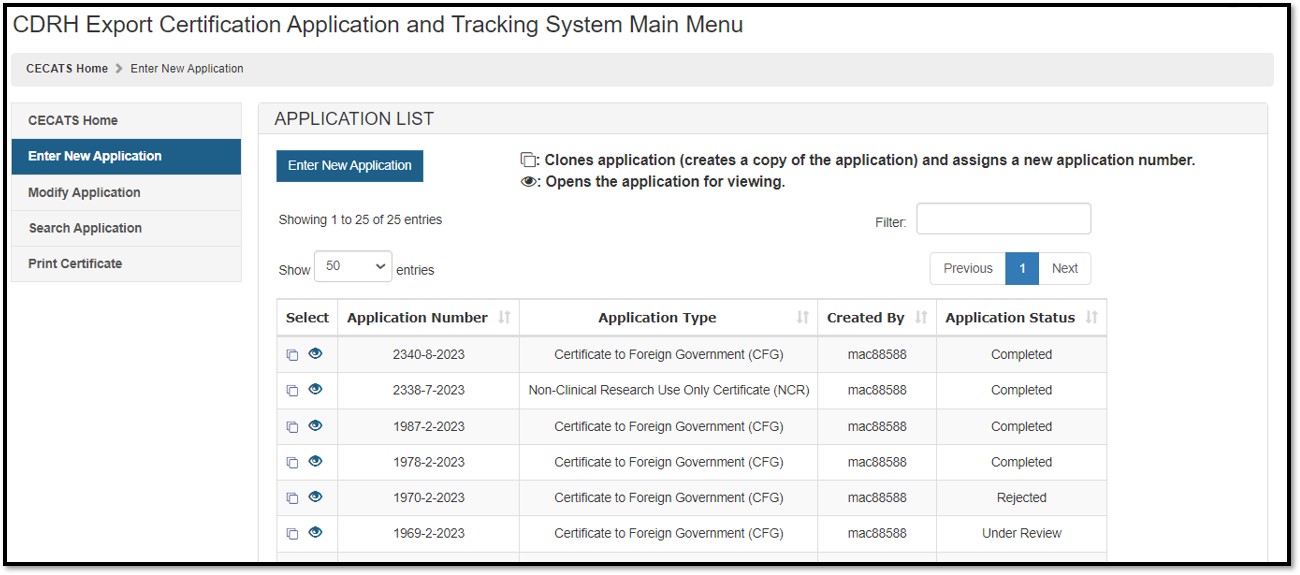
To create a new application, click "Enter New Application". All applications that you have saved or submitted will be displayed, as shown in Figure 3 below. Applications that are saved, but not submitted will be in "Draft" status until you submit them.
- To create a new application, click "Enter New Application" from the main Menu Page and then Click on "Enter New Application" button.
- To continue working on a draft
application,
click on Pencil (edit)
 icon
associated to the desired application.
icon
associated to the desired application. - To clone a
previous application, click on the Double Book (clone)
 icon
associated to the desired application.
icon
associated to the desired application. - Verify the information on each page is still correct and continue through all screens.
To search using the application number, click "Search Application". This option may be used to continue working on a draft application, clone a previous application, or make corrections to an application that is in "Return for Action" status.
Figure
3: Submitted and Draft Application View
The Center for Devices and Radiological Health (CDRH) issues several types of Export documents. When creating a new application, select which application type to be requested, as shown in Figure 4.
Figure 4: Application Type
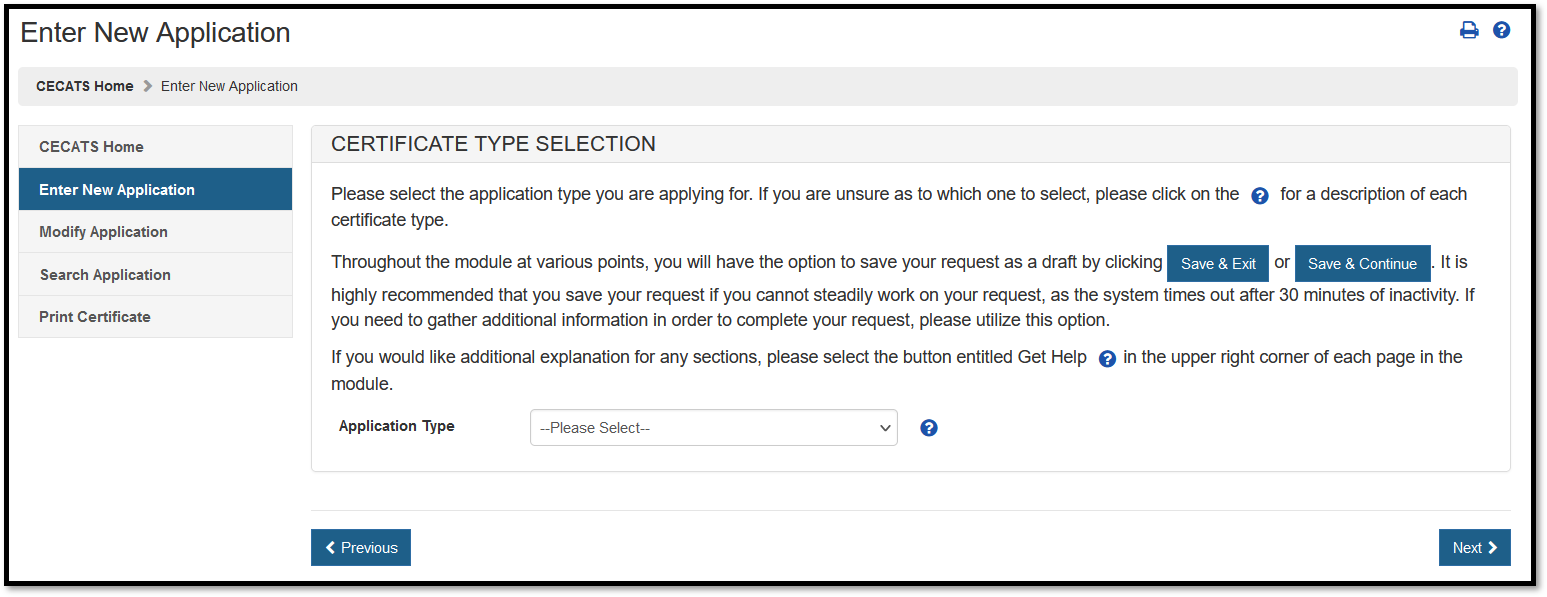
Select "Simple Notification" from the dropdown list.
Description of a Simple Notification:
For a description of each application type, select the red question mark icon located next to the application type list shown in Figure 4 above.
Simple Notification
While the FDA
does not require a firm to obtain written permission prior to export under
section 802, firms exporting a device under section 802 must provide written
notification to the FDA.
The notification must identify:
- The product's trade name
- The type of device
- The product's model number
- The country that is to receive the exported product if the export is to a "not listed" country (non-Tier 1 country).
If the export is intended for a listed Tier 1 country, then the notification may (but is not required to) identify the importing country. Or it may state that export is to a Tier 1 country without identifying the listed country.
Navigation
A status bar at the top of every page will track your progress through each step of the application process, as shown in Figure 5 below.
Figure 5:
Navigation Bar

A "Get Help" icon, located at the top right of each page, will provide page specific help. For an overview of all help files available; refer to the FIS Index of Help Pages at https://www.access.fda.gov/cecats/help/cecats-simple-notification-app.html. Also located in the top right corner of each page, is a "FURLS HOME" link that will navigate you to the FURLS Home page. The "CECATS HOME" link will take you to the CECATS Home page (Figure 2). To log out of the system, select "FURLS HOME" and click on "Log out".
At the top and bottom of each screen are navigation buttons as shown in Figure 6 below.
Figure 6:
Navigation Buttons
![]()
- Previous – Navigates back one screen or back one step. NOTE: Information entered on the current screen will NOT be saved if you select the "Previous" button.
- Save & Exit – Information entered up to this point will be saved. Your application will be set to a "Draft" status until you complete and submit the application. If you do not perform any activity for 30 days, the system will automatically cancel and delete the application. When you log into the CECATS system, all applications in a "Draft" status will be displayed after selecting the "Enter New Application" option from the main menu.
- Next - All information is saved on the current screen and navigates to the beginning of the next step. However, exiting CECATS without using the "Save & Exit" button will cause the loss of the entire request.
NOTE: All Fields except marked as "Optional" in parenthesis are mandatory fields. You will NOT be able to proceed to the next step or "Save & Exit" until all mandatory fields have been properly entered on the current screen.
Section 1 - Requestor Information
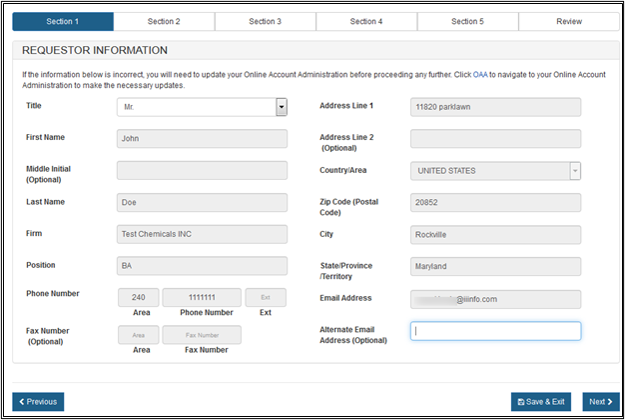
The system auto-populates specific information from your Online Account Administration (OAA) into section 1 (Requestor Information) of the application. NOTE: These fields cannot be edited in CECATS.
If the information is incorrect, click the "FURLS Home" link. Then click "Edit Account Profile" on the left-hand side and update your account profile accordingly.
NOTE: The "Title" field is required in section 1.
Once you have completed these fields, click on "Next". See Figure 7 below.
Figure
7: Section 1 - Requestor Information
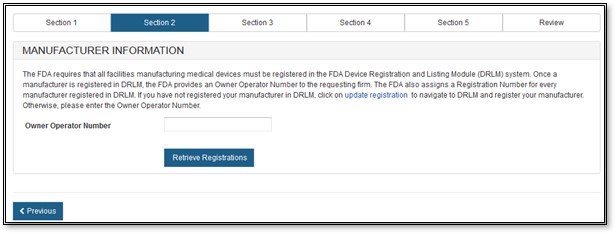
Section 2 - Manufacturer Information
The manufacturing company is the company that manufactures one or more of the products. FDA requires that all facilities manufacturing medical devices must be registered in the FDA's Device Registration and Listing Module (DRLM). Once a manufacturer is registered in DRLM, FDA provides an Owner Operator Number (OON) to the corporate headquarters and an establishment registration number to the manufacturing facility. If you have not registered your manufacturer in DRLM, return to the FURLS home page and register your manufacturer.
Enter the Owner Operator Number (OON) and click on "Retrieve Registration" button, as shown in Figure 8 below.
Figure
8: Registration Number or OON for Manufacturer
As long as the OON is active, the system will display all facilities associated with the OON. Select one or more facilities (if applicable) from the list of manufacturers that are in active status, as shown in Figure 9 below
Figure
9 – Add Manufacturer
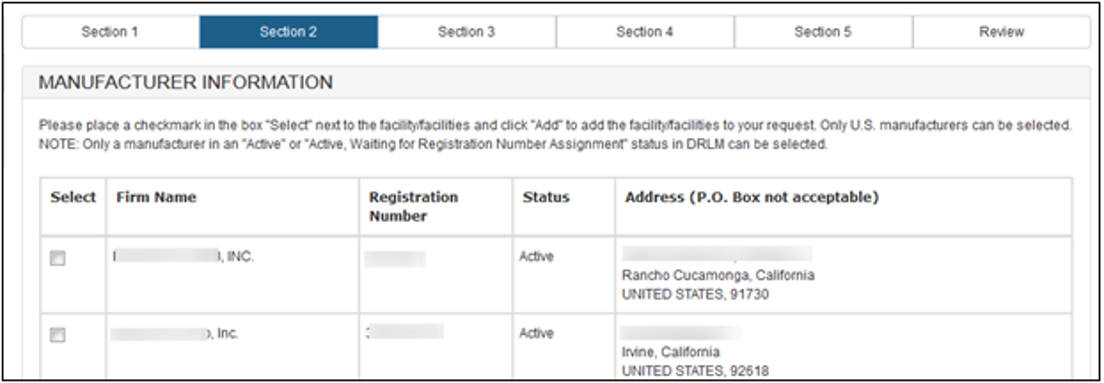
NOTE: For a Simple Notification, you can add up to a maximum of three manufacturers. Only U.S manufacturers can be selected.
Figure 10 – Updated/Added Manufacturer Information
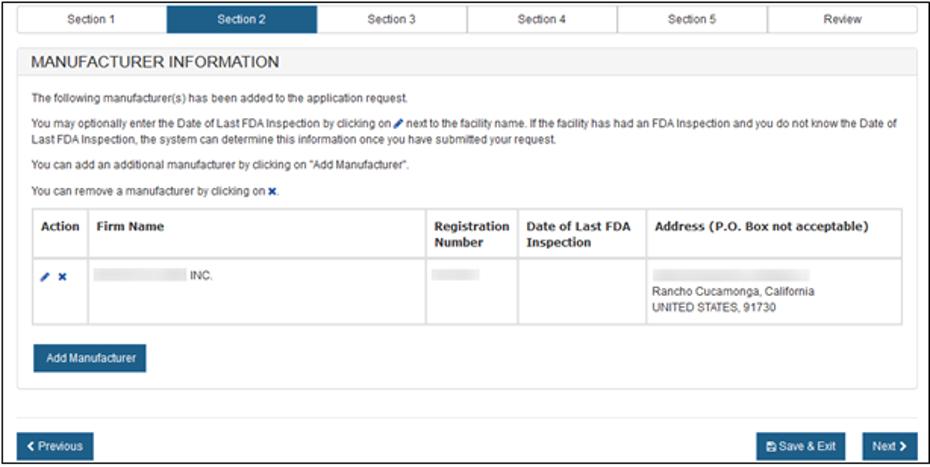
Once you have selected one (or more) "Active" manufacturer, click on the "Next" button to proceed.
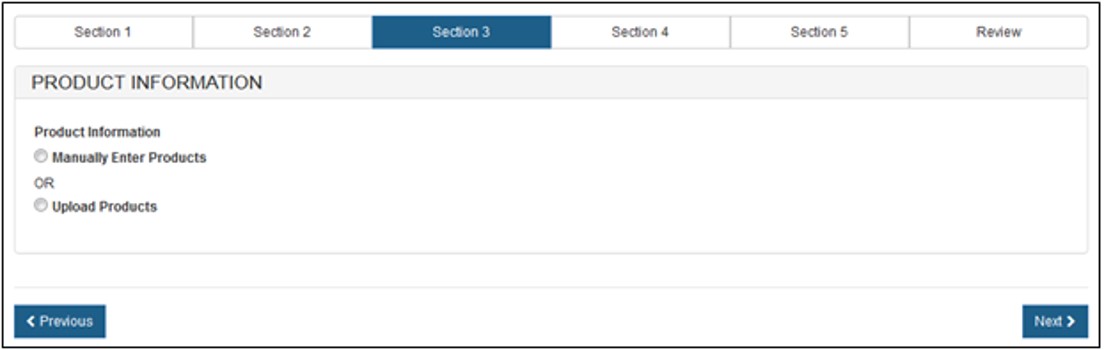
Section 3 - Product Information
In section 3, you will be able to provide information on your product(s).
There are 2 ways to enter the product information as shown in Figure 11 below.
- Manually Enter Products
- Upload Products.
Figure
11: Product Information
To Manually Enter Products
Type the Product Name information in the space provided. You also have the option to enter the Description of Device / Product Model Numbers. See Figure 12 below.
Figure
12: Manual Entry of Product Information
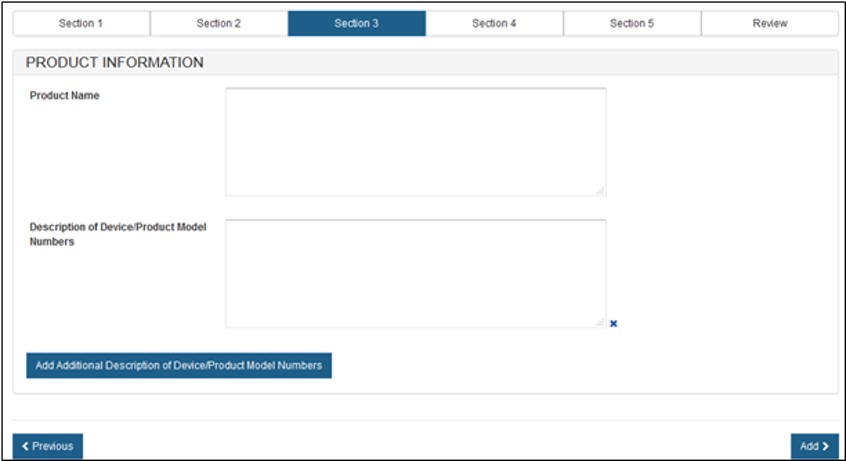
You can include multiple model names or numbers by clicking on the "Add Additional Description of Device / Product Model Number" button.
NOTE: The Product Name is repeated with each additional description of device/product model number entered.
Once you have completed entering the information on the first Product Name, click on "Add" at the bottom of the page.
The system displays the entered Product Name Information, as shown in Figure 13 below.
Figure
13: Product Information Added
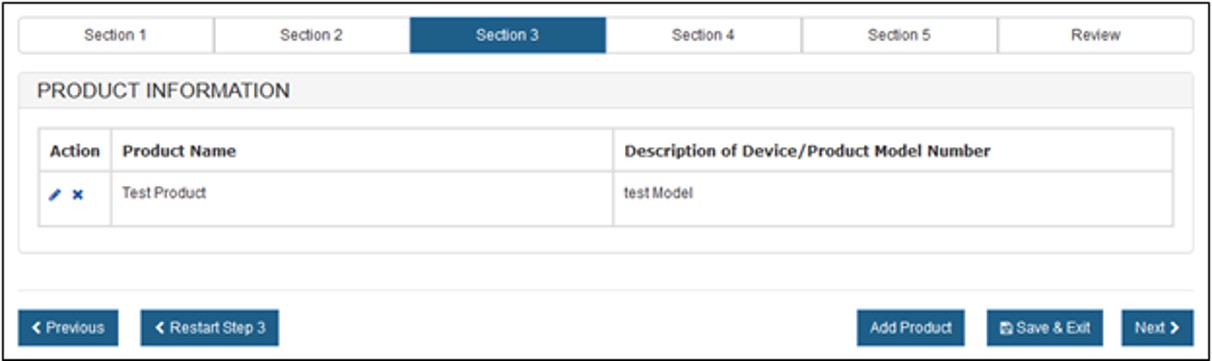
You also have the option to add an additional Product to the notification. Click on "Add Product" at the bottom of the page to enter another Product.
You can restart Section 3 by clicking on the "Restart Step 3" button. You will receive a warning message to confirm the restart.
Edit or Remove a Product
To edit or remove a product, click on the icon located in the "Action" Column, as shown in Figure 13 above.
Once you have entered the Product information, click on "Next".
NOTE: You must enter at least one Product Name to continue to the next step.
Upload Products
Click on the "product worksheet" hyperlink, as shown in Figure 14 to download a template which is in a format that must be used to upload your products.
Figure
14: Upload Products
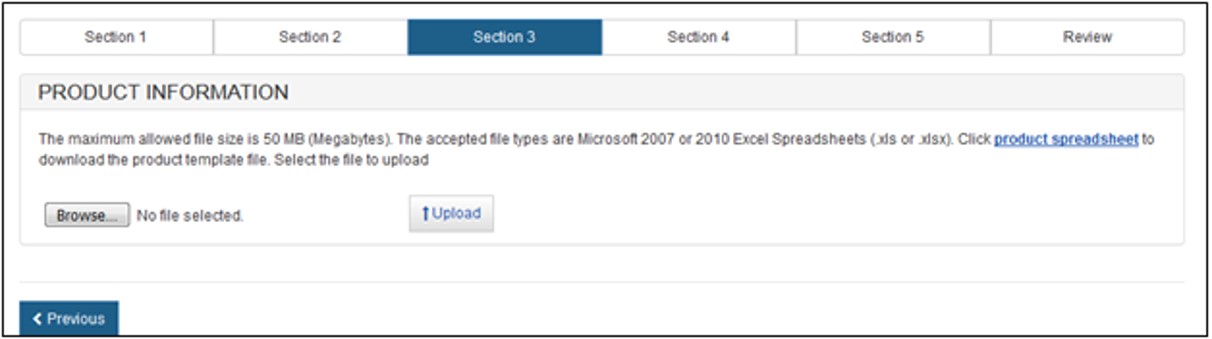
Additional directions / rules have been provided in the product template excel file. Please adhere to the following rules or the system will not accept the upload.
- Rows 1 and 2 must not be deleted.
- Do not separate products with any blank rows.
- Do not exceed the maximum character limit of 500 per cell.
- The system allows for special characters such as "&" and "/".
If these rules are NOT followed, the upload function will fail and NO products will be uploaded to the application.
When the product list is ready and saved to your computer, click on the "Browse…" button and navigate to the location of your file. Click on the "Upload" button. The system will display all product information ready for grouping.
You can restart Section 3 by clicking on the "Restart Step 3" button. You will receive a warning message to confirm the restart.
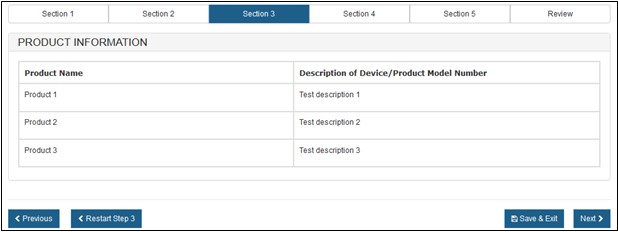
If successful, the system will display the product information, as shown in Figure 15 below.
Figure
15: Uploaded Products
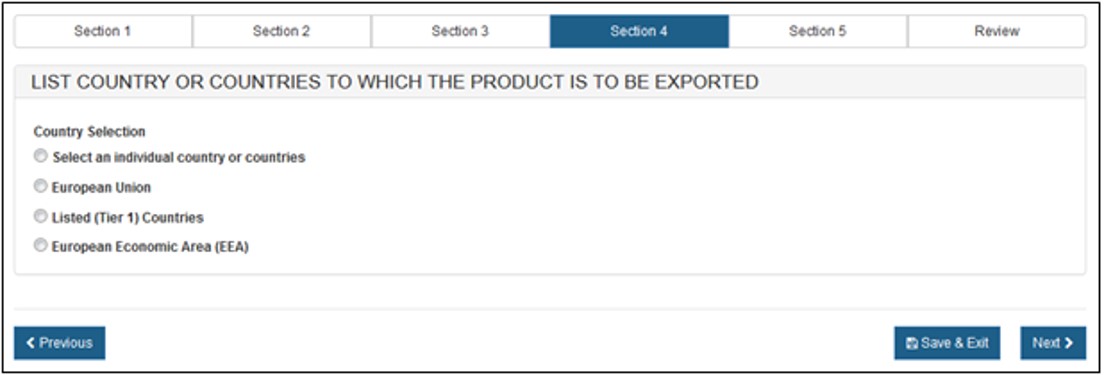
Section 4 – List Country or Country(ies) to which the product is to be exported
Select one of the radio buttons, as shown in Figure 16 below.
Figure
16: Country Selection
If you selected "Select an individual country or countries" the system displays a table of all countries, as shown in Figure 17 below.
NOTE: Another method to select a country (other than scrolling down the list) is to first click on a country from the country list and then type in the first few letters of the desired country name. The system will jump to the country that begins with the letters typed. You also have the option to hold down the "CTRL" button and select multiple countries.
Figure
17: List of Countries
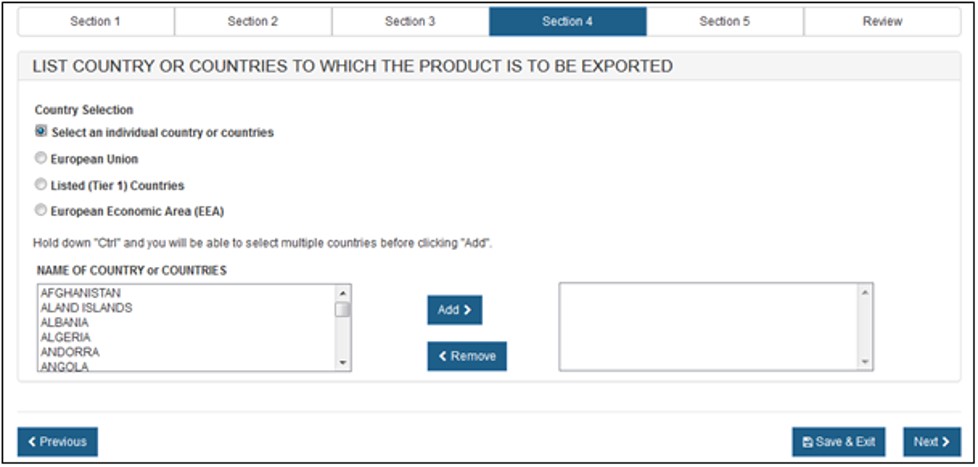
Once you have selected the country or countries, click on "Next" to proceed.
Section 5 - Disclaimer Statements
The "Disclaimer Statement" acknowledges that you, the responsible official or designee, certify that the facility(s) and the device product(s) identified meet the criteria of Section 802.
You must select the 'I Agree' button located at the bottom of this section and enter your name and title. You will not be able to continue with the application until these fields have been completed. See Figure 18 below
Figure
18: Disclaimer Statements

Once this section is completed, click on "Next" button to proceed to the "Final Review" page.
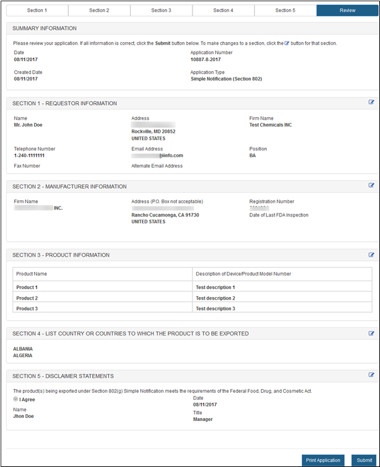
Final Review Screen
The system will display the entire application broken out by section, as shown in Figure 19 below. To modify a section, select the "Edit" button next to the section to be updated. The system will display the data entry screen corresponding to the chosen section; Make changes, as needed. When you are ready to submit the application, click on "Submit" button - located at the bottom of the "Final Review" page.
Figure
19: Final Review Page
You may choose to print your application prior to submission by selecting the "Print Application" button located at the bottom of the review page. However, the printed document will not have an assigned application number. The application number will be included if you click on "Submit" first and then click "View Complete Application" and "Print Application."
When finished, close the browser window in order to return to the CECATS application.
The system will display a message confirming the application was successfully submitted, as shown in Figure 20 below. The system will provide the application number. *Save this number for future reference. The application number will be required to check the status of the application.
An confirmation email will be sent, stating that the application was successfully received - along with the application number.
Figure
20: Submission Success Page
